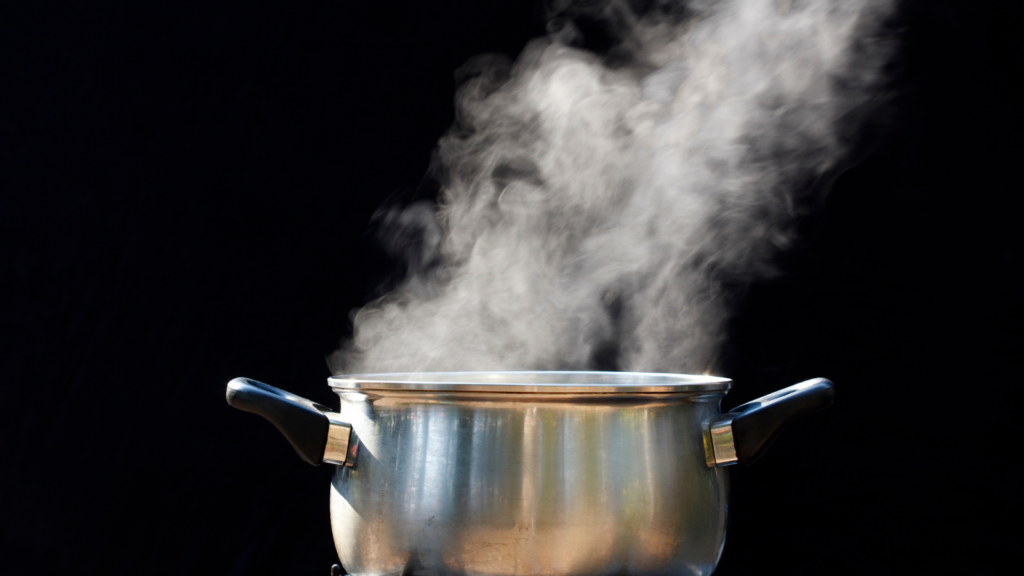
For those who consider themselves preppers, one essential skill stands tall in terms of its significance, and that is the ability to create heat and boil water in emergency situations without electricity. In times of crisis, whether caused by a natural disaster or other unforeseen survival situation, access to clean water safe to drink becomes an urgent priority.
Imagine finding yourself in the aftermath of a devastating hurricane, surrounded by stagnant water or an unforeseen camping emergency where your supply runs dry. With electricity out of the question, acquiring a safe source of drinking water becomes a massive obstacle. This is where the mastery of various effective and practical methods for heating and boiling water becomes indispensable for preppers.
#1 Gas Stove

Let’s kick off our journey into alternative water heating with the good ol’ gas oven. This household staple not only cooks your meals but also becomes a hero during power outages. While your electric oven transforms into a glorified kitchen ornament when the lights go out, your gas stove remains steadfast and reliable.
Now, you might be wondering, “Mike, why fuss over a gas stove? I have a shiny, modern electric one!” My friends, that’s the crux of the matter.
When a blackout hits, your state-of-the-art electric oven becomes a countertop paperweight. Meanwhile, the gas oven keeps soldiering on, proving its worth in these trying times
To heat your water on a gas oven is as easy as pie. Flip the burner on, park your water-filled pot on it, and before you know it, you’ve got hot water – while your electric stove sits around totally useless!
If your gas oven has an electric ignition (which is fairly common in a newer oven), you will need to manually light the pilot light first.
Your choice of container can be a game-changer here. Cast iron pots or conventional pots and kettles are the usual go-to’s, and why not? They’re practical, efficient, and can accommodate large volumes of water. This makes them perfect for those instances when you need to heat the water for cooking or cleaning during blackouts. But remember, when push comes to shove, a simple tin can, pot with a lid, or a glass jar can quickly become your new best friend for to boil smaller pot of water. Just remember to handle them with care and use an oven mitt to avoid any nasty burns to boil water without electricity.
Next, keep an eye on your flame and the position of your container. Your aim is to maximize heat while conserving gas. So adjust the flame to a medium setting and position the container right above it for even heating.
To sum it up, the gas stove is an oldie but a goodie when it comes to heating water sans electricity. It’s dependable, uncomplicated, and efficient.
#2 Camp Stove for Heating and Boiling Water

Here’s the deal, folks: when it comes to heating water in a pinch, a camp stove is your best pal. Whether you’re braving the wilderness or dealing with a power outage, these compact appliances won’t let you down. Let’s dive into why a camp stove could be your knight in shining armor in these situations.
There’s a lot to love about a camp stove. For starters, they’re portable. This means they can easily fit into your emergency kit or camping gear. Plus, they heat up water fast, making them a lifesaver when you’re yearning for that steaming cup of joe on a brisk morning when you need to boil water without electricity.
But, like all good things, a camp stove comes with a few caveats when you want to boil water. Depending on the type of fuel they use, they can put a dent in your wallet. Plus, they can add a bit of bulk to your bug out bag.
Camp stoves are not a one-size-fits-all deal. There are three main types: propane stoves, liquid fuel stoves, and canister fuel stoves. Each comes with its own set of perks and quirks when planning to use them to cook or to boil water without electricity.
Propane Stoves
Propane stoves are the go-to choice for many who want to boil water without power. They’re user-friendly and run on either 1lb for a single burner propane stove or multi-burner gas stove with 20lb propane tanks. With their multiple burners, they’re a whiz at boiling a large pot of water for pasta or brewing a big pot of coffee.
Liquid Fuel Stoves
Liquid Fuel Stoves are a reliable workhorse when you need to boil water. They’re powered by white gas or other liquid fuels. These stoves are great for boiling a kettle of water for tea or a pot of water for soup.
Canister Fuel Stoves
Canister Fuel Stoves are the travelers of the bunch. Compact and lightweight, they’re fueled by iso/butane blends. Though they might not be the top pick for cooking a feast, they’re just the ticket for boiling a cup of water for instant noodles or purifying water.
In the grand scheme of things, camp stoves offer a practical solution for heating water in various situations. So, whether you’re out exploring the great outdoors or confined to your home during a blackout, handle your camp stove with care and follow the manufacturer’s instructions. Here’s to safe and happy prepping!
#3 Propane Stoves Can Heat and Boil Water without Electricity

Propane stoves are like the superheroes of heating water. The mechanism is simple: spark up the propane, and you’ve got a flame ready to boil water.
These gadgets are easily accessible, raise the temperature of water rapidly, and allow for accurate temperature control – pretty nifty, right? However, they do come with their own set of challenges. The ongoing cost of propane and the need for a steady fuel supply can be a bit of a downer. Plus, safety is paramount—we’re dealing with flammable gas here!
Not all containers can withstand the heat from propane stoves. You’ll need to use heat-resistant materials like pots or camping cookware.
Getting your propane stove to heat or water is a breeze once you know the drill. Start by setting your stove on a stable surface. Next, hook up your propane tank and ignite the burner. Then, you can adjust the flame to your liking and place your water container over the flame. Easy peasy!
#4 Butane/Isobutane Stove to Boil Water without Electricity
Butane and isobutane stoves are the darlings of outdoor enthusiasts. They’re compact and portable, making them a top pick for campers and hikers. They operate similarly to propane stoves – ignite the gas, and you’re all set to boil water.
Butane/isobutane stoves are light, user-friendly, and perform well under a variety of weather conditions. But nothing’s perfect, right? Fuel canisters can be pricey, and they’re not always easy to find. Plus, these stoves don’t perform as well in extremely cold conditions when you need to get water to a rolling boil quickly.
Lightweight pots and kettles designed for outdoor use are your best bet for these stoves. Make sure the cookware you choose is compatible with your stove for stability and efficient heating.
Getting your butane/isobutane stove started is a piece of cake. Start by placing it on a flat surface. Attach the fuel canister, turn on the gas, ignite the burner, and then carefully place your water container on the stove.
#5 Alcohol Stove/Burner: An Ultralight Choice
Alcohol stoves are a go-to for many ultralight campers and backpackers. They burn denatured alcohol or methylated spirits, offering a simple, lightweight, and cost-effective fuel solution. However, be aware—these stoves may take a bit longer to heat and provide less control over the heat than gas stoves. Additionally, the flame is often invisible, necessitating extra safety measures in use.
When selecting pots and pans, consider lightweight options with a wide base to ensure stability. A wide-bottomed container distributes heat evenly, providing more efficient cooking and boiling
To warm water, place your stove on a stable, non-flammable surface. Fill it with alcohol, ignite the fuel, and then position your water container on the stove. Just like that, you’re ready to roll!
To enhance the efficiency of your alcohol stove, shield it from wind. And remember, safety first—never try to refill the stove while it’s lit. The flame could be invisible, so always let the stove cool down before handling or refilling it.
#6 Biogas Stoves: The Eco-Friendly Option
One of the most fascinating developments in the world of emergency preparedness is the advent of biogas stoves. These innovative devices generate a cooking flame using biogas, a renewable energy source produced from organic waste. It’s like turning trash into a culinary treasure!
This is an eco-friendly solution for how to heat water without electricity during blackouts or off-grid situations. Imagine reducing waste and creating a sustainable energy source at the same time. Now that’s a win-win!
Like every piece of survival gear in your bug out bag, biogas stoves have their pros and cons. Let’s delve into these a bit more deeply.
Advantages
- Sustainability: Biogas stoves utilize renewable energy and aid in waste reduction. That’s a double victory for you and Mother Earth!
- Use of Renewable Energy: These stoves run on biogas, generated from organic waste. Essentially, you’re transforming your trash into a useful energy resource.
Disadvantages
- Initial Setup Cost: Setting up a biogas system can be a bit on the pricey side initially, but consider it an investment in a sustainable future.
- Continuous Supply Needed: For a steady biogas flow, you’ll need a constant supply of organic waste.
- Space Requirement: The system does require some space, so careful planning is necessary for your setup.
Using a biogas stove is pretty similar to using a traditional gas stove. All your regular pots, kettles, and pans are compatible, provided they conduct heat well for maximum efficiency. Here’s a quick guide on how to boil water on a biogas stove:
- Turn on the gas valve.
- Ignite the burner.
- Place the water container on the stove.
Always refer to your specific model’s user manual as these steps might vary.
#7 Embracing the Wild: The Campfire Technique
The humble campfire, a survivalist’s best friend, offers more than just a cozy ambiance and a chance to roast marshmallows. This primitive yet efficient tool has been keeping us warm, providing light, and even cooking our meals since time immemorial. And yes, building a blaze in a fire pit is a fantastic way to get hot water when you’re in the wilderness. But how exactly do you go about it?
Campfires are both low-cost and versatile. Mother Nature generously provides wood in most wilderness areas, ready to heat a sizable pot of water.
So, which container should you opt for? Look for a pot, kettle, and cans that can withstand direct flame. Position these directly over your fire or, for more even heating, use a grate or tripod.
Here’s the lowdown on how to safely boil water using a campfire. Start by selecting a safe location, well away from flammable materials and sheltered from blustery winds. Once you’ve built your fire, allow it to settle to a steady burn before placing your water container. Keep a close eye on the water temperature to avoid overheating when boiling water.
#8 Home Comforts: The Wood Stove/Fireplace Technique
Moving indoors, let’s explore the cozy world of wood stoves and fireplaces during an extended power outage. These traditional methods of boiling water do more than just add a homely feel to your living space; they’re efficient and make use of renewable resources like wood. You can boil a pot of water or cook food in the fireplace too.
Like a campfire, a wood stove or fireplace has its own set of advantages and disadvantages. They provide efficient heating of large spaces and water and create a snug ambiance. However, a fireplace or wood stove require regular maintenance, including a steady supply of firewood and frequent cleaning.
When it comes to containers for use on woods stove, cast iron pots, kettles, or Dutch ovens are your go-to options for heating water. Like a rocket stove, they’re well-suited for temperatures high enough to boil water and safe for direct contact with flames or hot surfaces.
So, how do you get water with a wood burning stove or fireplace? Firstly, build a fire in your wood stove or fireplace, then position your container for optimal heat exposure and monitor the water temperature regularly.
#9 The Grill (BBQ, Charcoal, and Gas Varieties)
")
Your grill, whether it’s BBQ, charcoal, or propane grill, isn’t just a backyard superstar for whipping up juicy burgers or sizzling steaks. Did you know a charcoal grill or a gas grill can also be your best friend when it comes to the need to boil water without electricity?
Using your grill to produce hot water comes with its own set of advantages and challenges. On the upside, a charcoal grill or a gas grill are an effective, energy efficient, and convenient way to utilize a tool that’s probably already at your disposal to heat water to a rolling boil. Like wood stoves, grills can handle quite a large volume of water, making them an ideal choice during power outages or other emergencies when your regular water heater is out of commission. If you enough own a gas grill, you get the added advantage of precise flame control for perfect temperature regulation when boiling water.
On the flip side, grills, particularly charcoal ones, take some time to heat up. Fuel can be another issue; in an emergency, you’ll need a good stock of propane or charcoal hot coals to purify water. Also, grills can sometimes heat unevenly, demanding your constant attention to avoid any mishaps with your water container.
When heating water on a grill, your choice of container matters. You’ll want something that can withstand high temperatures and is sturdy enough to sit safely on the grill grate. Pots and kettles are excellent choices, but if you’re in a bind, even a heavy-duty aluminum can could do the job.
While heating water on a grill isn’t rocket science, it does require some finesse. If you’re using a charcoal grill, arranging your coals for an even heat source is crucial. For gas grill owners, controlling the flame is as easy as twisting a knob. Once your grill is good to go, place your water container on the grate. Then, it’s all about monitoring the water temperature and adjusting the heat as needed.
#10 Rocket Stove for Water Heating and Boiling Without Electricity
A rocket stove, my friends, are an absolute marvel in the world of emergency preparedness. These beauties are your best bet for boiling water in an eco-friendly way during a blackout or camping trip. Now, let’s get down to the brass tacks of these compact powerhouses.
You might be scratching your head, wondering why you’d want a rocket stove for boiling water. Well, these stoves are the Usain Bolt of the stove world; they’re incredibly efficient, using a mere fraction of the combustible material a traditional fire would require. Plus, the complete combustion process utilized with a rocket stove means minimal smoke, making it a greener choice for our planet and a healthier one for your lungs!
However, every rose has its thorns. The learning curve for using a rocket stove can be steep, and they require specific types of ,material, like small twigs or wood scraps. But, like mastering a tricky recipe, once you get the hang of it, you’ll realize it’s worth the initial effort to get a fire going when using rocket stoves because the electricity is out.
When choosing containers for your rocket stove, think stability. A frying pan, pot or kettle with flat bottoms are your safest option. Rocket stoves pack a wallop in terms of temperature output to boil water, so ensure your water container can handle the thermal onslaught.
Igniting a rocket stove is as easy as pie! First, light up the twigs etc. in the combustion chamber, then perch your water container on the stove. Keep a hawk’s eye on the water temperature, and you’re all set!
Here’s a pro tip for you: always fill your stove with dry, combustible materials – or even toilet paper.
#11 Tuna Can Stove (Hobo Stove) for Boiling Water Without Electricity
Let’s shift gears and talk about another ingenious contraption—the humble tuna can stove. Ideal for backpackers and survivalists, this DIY stove is a breeze to make and a featherweight solution for heating water.
A tuna can stove is a classic case of ‘small but mighty.’ They’re cost-effective and straightforward to create with everyday household items. It’s as easy as pie: get an empty tuna can, fill it with a combustible material like cardboard soaked in wax, and you’re ready to roll!
But, it’s not all smooth sailing. These stoves have a limited heat output, and they require constant monitoring. Plus, the burn time isn’t as long-lasting as some might hope for.
When using a tuna can stove, small is the way to go. A Small pot or metal cups will sit securely on the compact surface of the can.
To use your tuna can stove, simply ignite the wick material and carefully place your water container atop the can. Monitor the water temperature, and you’re good to go!
Here’s another safety note for you: shield your flame from the wind to maximize heat output.
#12 Hot Rock Method
“Necessity is the mother of invention,” an age-old adage that embodies the spirit of survival and emergency preparedness. One such innovation born from necessity is the hot rock method. This primitive yet effective strategy is used for boiling water and is as straightforward as it sounds: you heat rocks in a fire and then transfer them to a container filled with water. The heat from the rocks warms the water, leaving you with a steaming hot liquid!
As with everything, the hot rock method brings along its own set of benefits and drawbacks. The plus side? It utilizes readily available natural resources. No need for modern tools or equipment, just you, a handful of rocks, and a fire. This method is ideal when you find yourself in the great outdoors without the comforts of your camping stove or other amenities and need to boil water.
However, heating the rocks can take time, and not all rocks are created equal. Some, especially those saturated with moisture, could crack or even explode when heated. Consistently maintaining the water temperature can also be a challenge. It might sound daunting, but remember, survival mode is all about adaptation!
Choosing the right container for your water is crucial. It should be robust enough to endure sudden temperature changes without cracking. Sturdy pots, metal cans, or improvised containers such as hollowed-out logs are excellent options. It might sound like we’re channeling our inner Bear Grylls, but in a survival scenario, resourcefulness is key!
Ready to experiment with the hot rock method? This technique is particularly handy if you need to heat a substantial amount of water quickly. Here’s a step-by-step guide to help you out:
- Choose your rocks: Look for dry, solid rocks. Avoid river rocks as they may have absorbed water and could explode when heated.
- Heat your rocks: Place them in a fire and wait patiently for them to heat up.
- Transfer the hot rocks: Using tongs or sticks (improvise, if necessary), cautiously place the hot rocks into your water container.
- Monitor the water temperature: Keep an eye on the water to prevent it from boiling over or getting excessively hot.
Always choose dry and solid rocks and steer clear of river rocks. I can’t stress this enough – exploding rocks are dangerous!
#13 Friction-Based Methods
Ever pondered the fascination our ancestors had with rubbing sticks together? They were tapping into the power of friction-based fire-starting techniques, which have been a survivalist’s secret weapon since the Stone Age.
Before you dash into the wilderness to find a pair of sticks to rub together, let’s weigh the benefits and drawbacks of these methods.
- On the upside, friction-based fire starting doesn’t require any high-tech gadgets or materials. All you need are some wooden pieces, a little determination, and the willingness to invest some sweat equity.
- On the flip side, these methods require patience and physical effort. It’s not a walk in the park. Additionally, the skill and practice needed to successfully ignite a fire shouldn’t be underestimated. And, of course, there’s the potential for injury if you’re not careful – blisters and fatigue aren’t uncommon.
While containers don’t directly contribute to heat generation via friction, they come into play once you’ve sparked a flame. Any container that can withstand open flames – think pots, kettles, or cans – can be used to heat water.
There’s a variety of friction-based methods to choose from, with the bow drill, hand drill, and fire plow reigning as the most popular. These methods involve spinning or moving one piece of wood against another to generate heat and create embers.
So, how do you employ these friction-based methods effectively and safely? Here are a few golden nuggets of advice:
- Wood Selection – Softwood is the superstar here. It’s not only easier to work with, but it also generates heat faster.
- Proper Fire Lay – Consider this as your ember’s cozy nursery. You need to prepare a suitable spot for the ember to catch and grow into a full-blown fire.
- Patience and Persistence – Just like mastering any skill, this requires practice. Don’t be disheartened if your first few attempts don’t result in a campfire worthy of a sing-along.
- Caution – Avoid excessive force that can lead to blisters or fatigue.
#14 Solar Cooking Devices to Boil and Heat Water
Ah, the sun! It’s a celestial powerhouse that does more than just help you achieve a blissful tan or power your home. It also bestows upon us an incredible gift: the ability to cook meals and boil water. Behold the innovation that is solar cooking devices! These sun-powered marvels, such as solar cookers, ovens, and kettles, harness solar energy to generate heat.
Solar power often triggers thoughts of solar panels and renewable energy for our homes. However, the sun’s energy can also be utilized directly, without the need to convert it into electricity. Solar cooking devices are designed ingeniously to focus sunlight, generating heat that can be channeled to cook food or heat water.
You’ll encounter various types of solar cooking devices, including a solar cooker, solar ovens, solar shower bag, and solar kettles. Each of these devices has a specific purpose and offers a remarkable way to cook using the sun’s power.
Just like any superhero, solar cooking devices have their strengths and weaknesses. On the bright side, they are eco-friendly, operating without the need for burning material. This not only saves you money on operating costs but also reduces your carbon footprint. Additionally, they don’t emit smoke or flames, making them a safer cooking alternative in dry, fire-prone regions.
However, every superhero has their Kryptonite. In this case, it’s the reliance on sunny weather, which can be unpredictable. These devices also heat up slower compared to conventional cooking methods.
Solar cooking is not a one-pot-fits-all scenario. You’ll want to use cooking vessels expressly designed for solar cooking or black-colored pots that are champions at absorbing heat. And don’t forget a tight-fitting lid — it’s like a cozy blanket that keeps the heat from escaping!
Now that we’ve covered the basics, let’s explore how to use these solar cooking devices to boil water. Here’s where things get interesting — it’s all about positioning the device to capture maximum sunlight. Place your water container inside the device, then adjust the device’s orientation as the sun makes its daily journey across the sky.
Solar cooking tips:
- Preheat the device if possible. This is like a warm-up exercise that speeds up your cooking time.
- Use reflectors to increase heat concentration. Think of these as your solar cooking device’s personal cheerleaders.
- Position the device in an area free from shadows. You want your device to have an uninterrupted view of the sun.
#15 Reflective Solar Concentrators – Fresnel Lens
Reflective solar concentrators. A mouthful of a name, but a lifesaver in a pinch. These clever devices use reflective materials to gather sunlight and focus it onto a specific point or area. Picture a heat magnifying glass for your kettle or pot. This increase in heat concentration makes it a stellar way to warm up or boil water, especially when you’re out in the wild or facing a power outage at home.
Let’s delve into the nitty-gritty of these sunlight-harnessing gizmos. Starting on a high note, reflective solar concentrators are incredibly efficient in sunny conditions. They operate on renewable solar energy, a resource that’s as free as air (thanks, Sun!). To top it off, can you guess what the operational cost is? Zero, zip, nada!
But, these devices are sun-worshippers, meaning cloudy weather can throw a wrench in your warm water plans. They also require periodic adjustment to stay aligned with the sun – a smidge of manual labor. And remember, we’re dealing with intense focused sunlight here. If not handled with care, it can pose potential dangers, such as burns or even fire hazards.
Selecting the right container for your reflective solar concentrator is crucial in harnessing the sun’s power effectively. Dark-colored pots or kettles are your best bet as they absorb more sunlight. And, don’t underestimate the power of a lid! It helps retain the heat, which speeds up the heating process.
So, how do you use one of these solar concentrators? First, align the concentrator to focus the sunlight onto your container. Fill it up with water, and watch the temperature rise. Bear in mind, the sun moves (well, in reality, the Earth moves, but let’s not get into astronomy here), so you’ll need to adjust the concentrator’s angle to keep it focused on your pot or kettle.
Keep your reflective surface clean. Dust or dirt can hamper its performance, so treat it to a wipe down every now and then.
#16 Solar Water Heating (Shower Bag, Bottle in the Sun)
If you’ve ever soaked up the sun’s rays and felt that warm glow on your skin, you’ve experienced solar heat firsthand. But did you know you can harness that power for more than just a healthy tan? That’s right, folks, we’re talking about solar water heating. It’s simple, cost-effective, and a great way to utilize the sun’s abundant energy.
Solar water heating is a breeze to set up and incredibly budget-friendly. Plus, you’re using a renewable energy source – the sun – so it’s a win-win for you and the environment.
However, it’s not all sunshine and rainbows. Cloudy days can put a damper on your solar water heating plans, and the process can take longer than traditional heating methods. So while it’s a stellar option, solar water heating does have its limitations.
Ready to dive into solar water heating? Let’s explore two popular methods: the solar shower bag and the sun-warmed bottle.
Also interesting: Can You Shower Without Power?
The solar shower bag is specially designed for this purpose. These bags are usually black to absorb heat better and have a transparent side so the sun can work its magic.
For the bottle method, any clear bottle will work. Dark-colored bottles are especially effective, as they absorb heat more efficiently.
So, how do you get started with solar water heating? For the solar shower bag method, you’ll need to fill your bag with water and place it in a sunny spot. Then sit back, relax, and let the sun do its thing.
For the bottle method, simply fill up your bottle, place it in direct sunlight, and wait. Remember to monitor the water temperature to avoid any scalding surprises!
To maximize your solar water heating efforts, position your bag or bottle to catch as much sunlight as possible. Start early in the day to take full advantage of the sun’s generous rays. Insulated covers can also help retain heat.
#17 Candle/Tea Light Candle Heating
Sure, candles may seem like simple mood setters or odor neutralizers. But in the realm of emergency preparedness, they can serve as your trusty sidekick, helping you heat up a comforting cup of water when traditional methods fail during a blackout.
The beauty of using candles to heat water resides in its simplicity. It’s so straightforward, even a child could do it (under adult supervision, of course!). Your top-tier survival kit includes a handful of candles and a small metal pot or cup.
Balancing the Pros and Cons
Like all things in life, heating water with candles isn’t without its pros and cons. On the upside, candles are readily available, safe for indoor use, and quite portable. On the downside, they aren’t exactly the Usain Bolt of water heating. You’ll likely need multiple candles to get the job done, and it’s not a set-it-and-forget-it kind of deal. Remember, safety always comes first.
To get your water warming, start by lighting your candles. Next, set up a stable platform to hold the container above the flames. This could be a brick or a metal rack. Once your platform is sturdy, place your water container on top. Keep a close watch on the process. We want warm water, not a candle-induced sauna session.
To optimize your candle heating operation, consider these tips:
- Use multiple candles for more heat.
- Position the container close enough to the flames without extinguishing them.
- Never leave your candles unattended.
- Ensure adequate ventilation and use a fireproof surface.
#18 Chemical Heating Packs
Ah, the humble chemical heating pack. This little guy might not be the first thing that springs to mind when you think of survival gear, but it’s a real lifesaver in a pinch. These packs are small, lightweight, and perfect for heating water when you’re off the grid. No need for a roaring fire or a power outlet – just the magic of exothermic chemical reactions. Now, isn’t that a party trick!
However, like any good party trick, there’s a catch – the heat doesn’t last forever, and once the pack is used, it’s off to the bin. So, use your chemical heating packs judiciously and always remember to dispose of them responsibly.
To unleash the full potential of these packs, you’ll need a flat-bottomed container to ensure maximum contact and heat transfer. Choose materials that can handle the heat, and when you’re ready to rock and roll, give the pack a good shake or squeeze to activate it.
Here are some pro-tips to optimize your chemical heating pack experience:
- Stick to the script: Always follow the manufacturer’s instructions. Each pack has its unique quirks and activation methods.
- Watch out for leaks: Avoid puncturing or tearing the pack. As thrilling as surprise chemical leaks might sound, they’re best avoided.
- Insulate for the win: Keep your container and pack insulated to trap the heat.
- Monitor the heat: Always keep an eye on the water temperature to avoid any unpleasant surprises.
#19 Battery-Powered Heating Elements
Let’s jump into the future of survival gear with one of the most convenient ways to heat water – battery-powered heating elements. These compact devices use the magic of electrical resistance to generate heat and are powered by the humble battery. This makes them incredibly portable and perfect for those moments when you’re on the move or dealing with an unexpected power outage.
However, like all good things, there’s a flip side. The need for batteries means you’ll have to keep a stockpile or have a means to recharge them. Also, patience is key – they may not heat water as fast as direct flame methods. But hey, survival isn’t always a walk in the park, right?
When it comes to using these devices, you’ll want a container that can accommodate an immersion-style heater. Metal cups, mugs, or small pots are your best bet. The material should be heat-resistant and spacious enough for the heating element to do its thing.
Operating these devices is a breeze. Just insert the heating element into the water, ensure it’s fully submerged, switch it on, and sit back. But remember, safety first – no touching the heating element while it’s working its magic!
#20 Hot Air Balloon Burners
Let’s flip the script and talk about the underdog in the heating game – hot air balloon burners. You might be thinking, “What’s he on about?” But hear me out: these beasts, whose day job is inflating hot air balloons with a colossal flame, can double as a hot water generator in a pinch.
Sure, they’re a bit like using a sledgehammer to crack a nut, but they’re incredibly effective. The pros? They give off an enormous amount of heat and can heat up a large volume of water in no time. The cons? They’re hardly practical for your everyday, small-scale heating needs. They require specialized fuel and equipment, and the safety risks are not to be taken lightly due to the intense flame and heat they produce.
If you’re considering this method, you need to think big and sturdy for containers. We’re talking about the kind of industrial-sized metal pots or cauldrons you’d see in a Hollywood production of Mad Max. These can withstand intense heat without batting an eyelid.
Getting these burners to work for you is simple. Securely set up the burner, connect the fueling source, ignite the burner with caution, and place the water container safely above the flame. But remember, with great power comes great responsibility. You must continuously monitor the burner because of the high heat output.
Here’s a pro tip for safe and efficient use: maintain a clear and safe area around your burner, free from potential fire hazards. Never leave your burner unattended and always have fire safety equipment within arms reach. It’s always better to be safe than sorry, especially when dealing with equipment that doubles as a dragon!
#21 Hand Warmers
Now let’s shift our focus to the little guy – hand warmers. These pocket-sized devices are typically used for personal warmth but can also be repurposed to heat small amounts of water to a boil. They generate heat through a chemical reaction or the crystallization of a supersaturated solution.
The beauty of these devices lies in their compact size, ease of activation, and the fact that they don’t require flames or electricity. However, every rose has its thorns. The heat output is limited and the duration of the heat provided is temporary.
The perfect companions for hand warmers are small and flat-bottomed pot style containers like metal cups or mugs. This allows for close contact with the hand warmer to maximize heat transfer.
To get the most out of these, activate them (usually by shaking or kneading the pack), place the water container directly on top of the hand warmer or wrap the hand warmer around the container, and let the heat work its magic.
For an efficient use, bundle up the container and hand warmer together to retain heat. And as always, safety first! Avoid puncturing or tearing the hand warmer to prevent leaks of the chemical contents. Keep an eye on the water temperature to ensure it doesn’t overheat or cool down too quickly.
#22 Car Kettles
Picture this: You’re road-tripping across the country, miles from the closest coffee shop, and you’re desperate for a piping hot cup of coffee. What do you do? Settle for lukewarm thermos coffee, or brew a fresh pot right there in your vehicle? If you’re equipped with a car kettle, the choice is clear.
Car kettles, my friends, are the unsung heroes of the travel world. These compact powerhouses plug directly into your vehicle’s 12V cigarette lighter socket, heating your water on the spot. Not only are they user-friendly, but they’re also designed to fit snugly into most car cup holders. Now that’s what I call convenience on wheels!
Now, before you get too excited, remember that every superhero has a weakness. Car kettles, while impressive, can be a tad slow and are reliant on your car’s battery. So, a friendly reminder: avoid using them when your vehicle’s engine is off to prevent battery drainage. And let’s not forget about safety! Be mindful of hot surfaces and components when using your car kettle to boil water.
#23 Geothermal Sources
For those of you brave enough to venture off the beaten path, let’s discuss a more unconventional method of heating water: geothermal sources. These are Mother Nature’s answer to the kettle, offering a unique solution for those adventurous souls out in the wilderness who need to boil water or for making food.
Imagine you’re hiking near a geothermal vent or a hot bringing water to a boil is not going to be a stressful situation. Instead of burning through valuable fueling resources, why not harness the earth’s natural heat? All you need is a heat-resistant container like a metal pot or kettle to bring water to a boil. Be sure to test the water temperature before using it though; Mother Nature doesn’t come with adjustable settings!
Conclusion
Selecting an appropriate heat source plays a pivotal role in ensuring safe and efficient water heating. While traditional methods like campfires or wood-burning stoves remain reliable alternatives, investing in portable gas stoves or solar cookers can significantly enhance your preparedness arsenal. By assessing your specific needs and considering factors such as portability, duration of use, and availability of fuel, you can make an informed decision about the heat source best suited for your emergency situation.
But it’s not just about the heat source; the utensils or tools you use can significantly impact your water heating efficiency. From durable metal kettles to lightweight and compact stainless steel bottles, selecting the right utensils can expedite the boiling process and ensure optimal heat distribution.
Amidst the urgency of water safety, it is crucial to prioritize safety precautions. Paying meticulous attention to the storage and handling of fuel sources, avoiding enclosed spaces to prevent carbon monoxide poisoning, and implementing proper fire safety measures are all essential for protecting yourself and those around you.
Mastering the skill of heating and boiling water offers immense benefits toward self-sufficiency and preparedness, regardless of the challenges you might face. By honing this essential survival skill, preppers increase their chances of obtaining clean water even in the direst situations, ensuring their family’s health and well-being.